Photoflex's Basic Digital Lighting Kit
 By MIKE PASINI
Editor
The Imaging Resource Digital Photography Newsletter
Review Date: March 2002
Our UPS guy is a saint. He always waits while we extract ourselves from the latest mess we've gotten into (as if our autograph were worth something). But the other day he outdid himself. He hauled the 14 lb. Photoflex Basic Digital Lighting Kit up the stairs to our lair.
This is a big box. We actually introduced ourselves to it and took off its coat before we realized it wasn't going to sit down and make itself comfortable. It did seem to enjoy the cashews, though.
COMPONENTS
The kit contains a lightweight tripod-like light stand, a fabric dome with a reflective interior and a separate white vinyl diffuser for the front of the dome, an elongated 500-watt incandescent bulb, a bulb housing, a swivel mount to connect the housing to the stand, a hefty connector to connect the dome to the housing and a power cord to connect to Thomas Alva Edison.
 |
| Contents (not counting the peanuts) |
Oh, one more thing. A CD with seven lessons from the Web Photo School (http://webphotoschool.com).
But there was no "Congratulations!" flyer greeting us when we opened the box. Just a bunch of boxes. Yikes.
So our first question was how comfortable we would be assembling it. When we recently completely dissembled, cleaned and successfully reassembled a front derailleur on a 20-year-old road bike, we were reminded of a valuable lesson. Understand the thing. How it functions. What it has to do.
And the only way to do that is to Read The Fine Manual.
RTFM
In this case it was a delightful, browser-based presentation on CD. Had we bravely opened the boxes of the components, however, we would have found the printed assembly instructions inside.
But we wanted the big picture. What's this thing do?
For that the seven lessons were a great introduction. Profusely illustrated, they covered exactly the stuff we wanted to know.
We skipped the first, which showed us how to put stuff in our digicam. But we have to say, skimming through it, what a great intro for the new digicam owner. Good pictures, simple descriptions and great lines like, "You can only put it [the memory card] in one way." Reassurance, that is.
But the topics we did study covered shooting portraits with a single light source and shooting product photography with a single light source. Because the kit only includes one lamp. We really didn't think one would be enough.
The lessons are excellent. They start with an on-camera flash reference shot (what you've been doing) before introducing the Photoflex. Rather than simply demo a single setup, though, the lessons show how to use the Photoflex in a variety of ways, even adding reflectors. And every step is illustrated with example shots so you can immediately see the point of the change.
We were also amused to go through the lesson on compositing in Photoshop (in which a wild and crazy guy is captured inside a tiny glass bottle). Again, the steps were clearly laid out and the explanation started with the problem to be solved.
All this didn't take long. A cup of coffee. Then we were ready.
ASSEMBLY
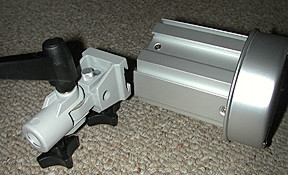 |
| The mount, rail and cover |
We started with the tripod. Nice stuff. Plastic knobs on three extensions and reinforced legs that spread as wide as you need to keep the stand stable. Very easy to lock and unlock. And lightweight. Put a hat on it and send it to Washington as Mr. Smith, we say.
Next we took a look at the housing. Nice, heavy metal. There's a protective cover over the ceramic socket and three "rails" to attach the swivel mount. We picked the rail without a logo on it, slid the mount on and tightened it.
The swivel mount drops onto the tripod where, with a twist of its lower knob, you prevent it from falling off without actually tightening it, so it can swivel. It also lets you adjust the hood angle.
 |
| The swivel mount |
The next piece we assembled was the dome tent. It was easier than it sounds.
 |
| The dome tent |
It comes rolled in a compact sheath. Two pieces: the black exterior/silver interior dome itself with four built-in framing rods and the white diffuser that attaches across the opening with Velcro. The hood has heat vents held open or tented by Velcro, too.
This attaches to the lamp housing with a hefty metal connector plate. At the corners of the plate are four sockets for the tips of the four framing rods built into the hood itself. You pop one in, rotate, pop in the next until, presto, your flat fabric springs to life as a dome tent.
 |
| The lock in its connector hole |
Now the tricky part.
The connector plate is hefty for a good reason. It rotates. So no matter what position the hood is in when you mount it, you can rotate to suit later.
Rotate, swivel, raise or lower. The thing knows how to dance.
But you have to align the housing to the connector so the housing lock will align with its connector hole when you rotate the housing a quarter turn to its locked position.
There's a brass knob on the inside of the connector to help you prevent the connector from rotating as you turn the housing to the locked position.
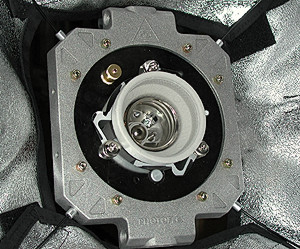 |
| The bulb housing |
Although the documents show the connection being made with the bulb in the housing, do it without the bulb.
All that's left is to screw in the bulb and find a three-prong socket for the nine-foot power cord (with a switch at the three-foot point).
It's wise, incidentally, to avoid handling the bulb with your bare fingers. Use a handkerchief or napkin to avoid getting oil on the surface of the bulb. And let it cool before you take it apart.
In actual use, we can tear down this setup and get it up within five minutes. And making adjustments is as fast as thinking about them.
Photoflex offers a cover to protect the lamp when it's mounted to the head, so you don't have to wait until the bulb cools off to take it apart. And they plan to introduce a bag to carry the whole kit, including a compartment for the bulb.
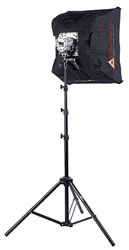
LIVING THE HOT LIFE
As a hot light rather than a strobe, you can actually see what shadows you're creating and soften, lighten, offset them, whatever you like. Before you take the shot. We liked composing our shadows this way. Very much.
And since there's no strobe to sync, nothing has to attach to your camera. So there's no trigger voltages to fry your digicam or proprietary sync cords to buy.
You simply set up, turn on the light and shoot when you want. Light(s), camera, action, as someone once said rather loudly.
Hot lights got their name because they tend to burn hot enough to smell. Some subjects even wilt in their heat.
But the Photoflex unit kept its cool. The soft box is compact but very well ventilated.
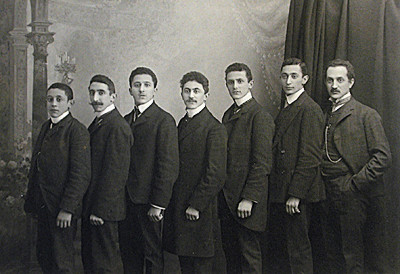 |
| A photo copied and illuminated solely by the Photoflex (if greatly finagled). The Marx Brothers had nothing on these guys. |
The 500-watt bulb can be used bare or behind the diffuser. There was no drop-off in illumination (200 Lux at 10 feet) when diffused in our product shots. A 1000-watt bulb (400 Lux at 10 feet) is also available. Both 3200-degree Kelvin lamps have a life expectancy of 300 hours. We found replacements at Calumet (http://www.calumetphoto.com) for $43.99 for the 500-watt bulb and $68.99 for the 1000-watt bulb.
 |
| Product shot with white card on opposite side |
We left this handy unit poised over our posing table, where we do product shots, but it easily followed us wherever we needed it.
At full extension the stand bends a bit off the perpendicular, but never seemed in danger of tipping over. The legs extend well out to balance the load and prevent it from falling.
SUBJECTS STUDIED
Working with just one light was more an uncomfortable thought than a handicap. Of course, two of these would be twice as good, but we managed just fine with one.
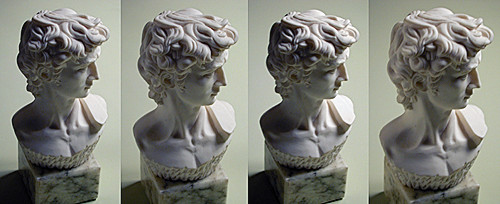 |
| Bare, Bare with reflector, Diffused and Diffused with reflector Note how the shadow is cast on the ground |
We set up small objects using the diffuser on the soft box and a reflector on the opposite side of the main light to soften the already soft shadow. That gave us quite good results (which you'll be able to see in our future product shots).
And you can kiss red-eye goodbye when you use it for portraits. You may also find your subjects smiling more frequently, unassaulted by flash, basking in the warm glow of your Photoflex. There's something friendly about incandescent light.
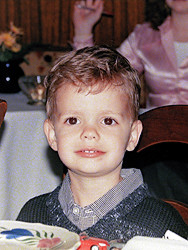 |
| A negative (crop) converted |
One situation in which one light really shines, though, is film copying. Using Nikon's slide copying adapter on a Coolpix, we simply set the white balance to incandescent and put the camera about a foot in front of the soft box covered with the diffuser to shoot some color negs. We got very evenly illuminated and well-balanced shots that were easy to convert to positive with a custom curve in Photoshop. We've had trouble using sunlight in the past (the earth moves faster than we do), so this was a welcome discovery.
CONCLUSION
Photoflex products (the PDF catalog is on the CD) are available from a number of camera shops but we recommend visiting the Photoflex site (http://www.photoflex.com) to find a dealer. We found one online dealer (http://www.belaircamera.com) selling this kit for $299.95, a hefty discount from the $399 list price.
The Photoflex Basic Digital Lighting Kit is a professionally manufactured unit that includes excellent basic lighting training. It's compact enough to take anywhere, easy to set up and a snap to adjust. It makes a great first hot light but we think it would be welcomed in any studio (where there's often enough hot air). Plus, you really don't need a UPS guy. Highly recommended.