TINY & AFFORDABLE GPS DEVICE
i-gotU GPS --
Tracking Routes, Mapping Photos
By MIKE PASINI
Editor
The Imaging Resource Digital Photography Newsletter
Review Date: August 2009
If the idea of knowing where you shot each photo appeals to you, then a GPS device is in your future. There are two approaches to recording this information in the Exif header of each image file, though. Each has its advantages and drawbacks.
Some cameras feature an internal GPS radio and, much like them, others have the ability to write GPS data from a GPS device directly into the image file header when the image is taken. Our review of the Macsense Geomet'r covered one such device.
The other approach is an external device that records, at regular intervals, your location. Later, when you get back to the keyboard, software on your computer matches the timestamp of your images files to the log recorded by the device to find out where the photo was taken.
Either approach lets you map your images using either software supplied by the product manufacturer, GPS-aware software or photo sharing sites.
There's no question the integrated device, whether built into the camera or attached to it, is a real convenience, recording location as the image is taken. But a separate device, like the i-gotU, let's you pop the location data into images from any number of cameras and cellphones. So you can share the data with the friends who accompanied you.
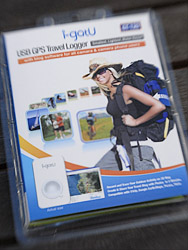
In the Box. The i-gotU comes with a USB cable and a software CD.
And because it's always on during the shoot, recording location at intervals you determine, it can map your route, too. You don't have to take a picture at every intersection to know which way you went.
The Global Positioning System, developed by the U.S. Department of Defense, is a satellite-based navigation system with at least 24 medium-Earth-orbit satellites that can tell a GPS receiver where on Earth it is using microwave signals.
GPS satellites circle the earth twice each day on very precise orbits. A GPS receiver compares the time a signal was transmitted by a satellite with the time it was received to tell how far away the satellite is. By comparing multiple signals, the receiver can calculate its exact location using a method called triangulation.
In 1982, President Ronald Reagan issued a directive making the system available for civilian use at no charge. All you pay for is the receiver to communicate with the system. That has led to the development of GPS devices that use the system in navigation, map-making, land surveying and other activities that need to know a precise location. Which is why we've begun to see cameras and camera devices that can collect GPS data and associate it with particular images.
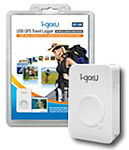
No question, this is the worst name we've ever run across. The thought of having to type it repeatedly in a review was nearly enough to discourage us from bothering. But the $70 i-gotU GT-120 GPS Logger from Taiwan-based Mobile Action was worth the trouble.
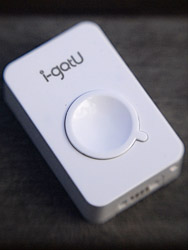
i-gotU. Seen without its blue soft rubber protection.
The compact, water-resistant device is actually quite a bargain as GPS devices go. The Macsense unit was about twice as much and both use the same SiRF Star III 65nm GPS low power chipset.
When we say compact, we mean 0.5 inches thick, 1.0 inch wide and 1.75 inches long. It comes with a blue, soft rubber case to protect it from drops. One corner is exposed so you can attach a wrist strap or lanyard. The bottom of the device has a proprietary USB 1.1 connection that mates with the included USB cable to charge the unit and transfer data from it.
It weighs less than an ounce, too, so you won't even feel it when you put it in your pocket or tie it to your backpack.
The Programmable Ready-Only Memory chip it uses does not support downloadable firmware updates. But it's hard to imagine it would ever need one.
Unfortunately, the software to get the data from the small unit is Windows only. Nothing we tried on the Mac would recognize the i-gotU (and the Geomet'r software wouldn't read the GPS tags the i-gotU software added to our JPEGs, either). Mobile Action suggests you "install the Parallel Desktop or VMWare software, thank you."
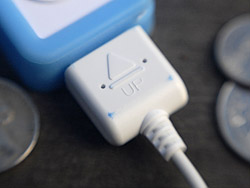
USB. You bend the plug up into the i-gotU to connect it.
USING THE I-GOTU | Back to Contents
It takes about four hours to charge the built-in 230 mAh lithium-ion battery the first time you use it. The manual warns you about that, to its credit. Subsequent charges are much quicker, though, at just two hours. To charge it, just connect the USB cable to your computer. But be sure the arrow on the USB connector and the i-gotU itself are both facing up when you connect them.
Once you've got the battery baked, the real trick to using the device is to make sure your camera has the right date and time. The i-gotU will pick up the time and date from the GPS satellites it finds, but you have to sync your camera to that time, so don't rely on the wall clock. Find a reliable source (like http://www.time.gov) for the exact time and set your camera. This is especially true if you haven't set your camera's clock for a while. It's probably running a little fast.
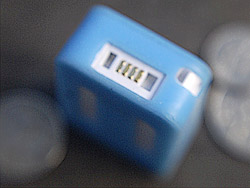
USB Connectors. Note the lanyard eyelet in the corner.
The next trick is to power up the i-gotU. That isn't hard. Just press the big button on the front panel (hold it down for a second) and look for the blue LED to blink behind the white plastic.
But do this when you are outside with nothing between you and the big blue sky because this is when the device looks around for GPS satellites. Mobile Action says it will take up to 35 seconds to sync with the satellites. When it starts logging position, both the red and blue LEDs will blink twice and continue to blink once each time it takes a reading.
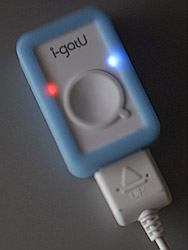
Charging. The red and blue LEDs indicating the unit is charging.
You can set the interval between each reading and consequent log entry using the included software. The default is every six seconds, which gives you 10 hours of battery life. You can also record a location just by pressing the button on the device.
Once you've turned it on and synced, you have started your trip. Leave it on until you finish your trip. But then be sure to turn it off (look for the red LED to blink once), or you'll map everywhere else you've gone after. The trip doesn't really have anything to do with your images, but with the tracking data.
With the unit synced and powered on, you're ready to take a hike and shoot some pictures.
SOFTWARE INSTALLATION | Back to Contents
We installed the software -- @trip PC -- on Windows XP and then immediately upgraded to the latest version. The software is supplied on a mini-CD, but it's also available as a download if you have a slot-loading drive that can't read small CDs. In addition to XP, Windows 2000 and Vista are also supported.
The software install went smoothly, installing a device driver, the application and, if necessary, Windows .NET framework 2.0 (but the current version is 3.5, if you've been dutifully updating).
With the software installed, you're ready to attach the i-gotU to read in a log and write GPS data to the photos you took at the same time.
Attaching the i-gotU can be trickier than it should be. Sure, you can plug it into a USB port and it will start charging, but getting @trip PC to recognize it is the tricky part.
We were only able to get the software to see the device when we started @trip PC first, then plugged the i-gotU into a free USB port and waited for @trip PC to find the i-gotU.
USING THE SOFTWARE | Back to Contents
The @trip PC software application must have looked great on the developer's whiteboard. It functions as promised and it promises a lot -- but we struggled with its interface. Rather than presenting a menu, it relies on buttons whose icons are just not quite as expressive as the plain "Import..." or "Map" command of a menu bar might be. We were consequently constantly hovering over the buttons for a little help deciphering what they do.
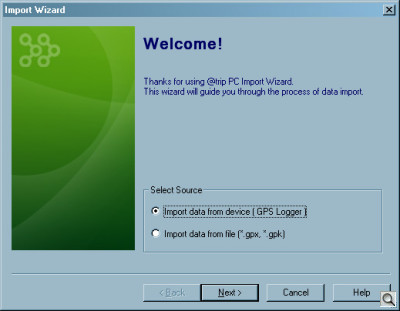
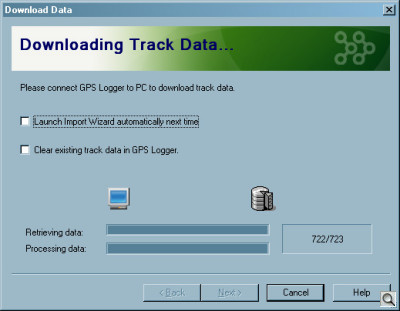
The first thing you want to do is import the tracking log or logs stored in the i-gotU. The program uses an Import Wizard (a series of dialog boxes) to guide you through the process. In short, you select the i-gotU as the source, enter a track name and watch the program import the data.
The tracks are the logs of locations for each session you had the device on. Turn it on to start a track, off to end one. But crossing a day boundary will start a new track as will acquiring more than 6,000 locations (or waypoints), the mapping of which can overpower your computer.
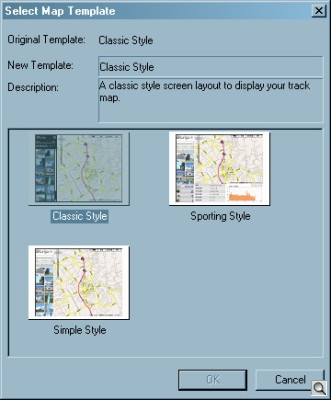
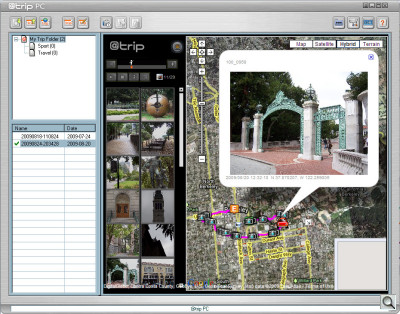
Once the tracking log is in the computer, you can select a template to display the trip and the images. Templates show a map on the right side with thumbnails on the left, in various styles. You can also name the trip and give it a description, handy for sharing the trip on the Web.
To get photos onto the map and optionally write GPS data to their Exif headers, you Add them to the trip. That happens pretty quickly, although not all images get GPS data, usually because the time can't be parsed or is out of range.
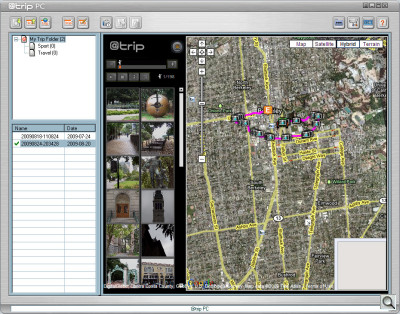
Once that's done, you'll see the map with icons indicating where your images were taken. Click on an icon and the image will pop up. The images are also thumbnailed on the left side, so you can click on them to see where they were taken.
Your route, more or less, is also indicated on the map. Don't expect the path to follow roads precisely because the i-gotU is not a navigation device placing a location on known coordinates. Instead, it's a tracking device that just records locations. And its locations are mapped to Google Map, which is not as detailed as GPS maps, Mobile Action explained. The time between readings can also affect how the route was drawn as it moves from one location to another.
But we actually found the route to be pretty accurate. We were on sidewalks for the most part, though.
Our Razr cellphone images, despite using Exif headers with the time and date, did not sync with the tracking log (they were oddly five hours ahead of the log). And, of course, you can't sync Raw files, just JPEGs.
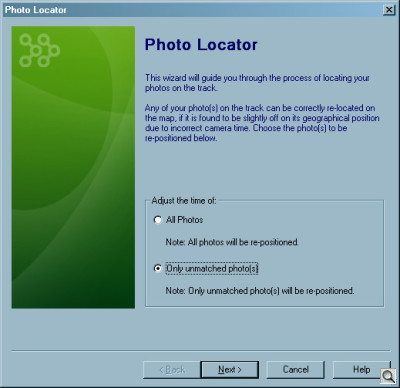
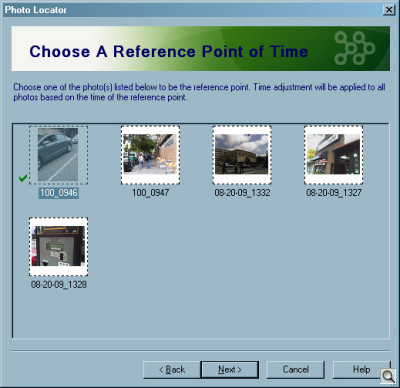
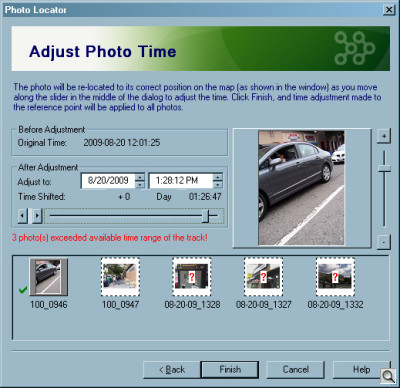
You can manually add those images to your trip, however, using the Photo Locator function. Start by indicating which photos (all or unmatched) you want to edit, then select one photo to set the reference time, before selecting each unmatched photo you want to adjust. A dialog box with a slider for the time adjustments available in the log lets you change the time.
Changing the time was a little clunky. We weren't sure which image was selected, which was being edited, how the reference time was being used and a few other things. They just weren't clearly rendered on the screen. That user interface thing, you know.
Our other JPEGs had GPS data added just fine, however. And we weren't using a recent digicam, either, but a vintage 2005 Kodak.
SHARING THE TRIP | Back to Contents
Once you've got the map layout the way you want it with all your images placed, you can share the trip in any of several ways.
You can use the @trip server after registering with it. The Share Wizard in @trip PC will step you through the process of uploading your trip to the server.
You can also export your trip content in i-gotU's MHT format or Google Earth's Keyhold Markup Language files (KML or the zipped KMZ). And you can back them up to a local folder or a Picasa or Flickr Web album.
You can export the tracking log as either a Comma Separated Values file (the old *.csv format you can import into a spreadsheet) or a GPS eXchange Format (also known as GPX) file for use with any software that reads GPS device logs (download our trip as an example). You can also save the track in GPK format, which is the @trip native format.
The CSV file reports date, time, latitude, longitude, altitude, speed, course, type, distance and essential fields.
GPX is an XML format that, in this case, reports the latitude, longitude, elevation, time and speed of any tracking point.
We were able to open the exported GPX track for one of our photo walks on the Mac using the free GPSTrackViewer. We learned our walk was marked with 723 waypoints over 2.39 miles and took an hour and a half at 1.61 MPH (although most of the time was spent admiring our photos and a good bit in Doe Memorial library as we dashed around Berkeley) going between80 feet and 175 feet (with a low of 23 feet and a high of 502 feet) in elevation. The program also identified selected waypoints using Google Map.
EXIF GPS DATA | Back to Contents
The actual GPS data written to your JPEG images includes the following tags in the Exif section of the Exif header:
- GPSVersionID: 2.2.0.0
- GPSLatitudeRef: North
- GPSLongitudeRef: West
- GPSAltitude: 57.799998 m
- GPSSpeed: 2.142
And in the Composite section:
- GPSLatitude: 37 degrees 52' 5.03" N
- GPSLongitude: 122 degrees 16' 5.45" W
- GPSPosition: 37 degrees 52' 5.03" N, 122 degrees 16' 5.45" W
GPSLatitudeRef appears as either North or South. We're in the northern hemisphere (above the equator), so North would be right. Likewise GPSLongitudeRef can be either East or West. We're west of the Greenwhich meridian, so that makes sense, too.
The tags GPSLatitude and GPSLongitude report our actual position.
GPSAltitude measures our height above sea level.
The altitude accuracy of GPS devices is often compromised by the device's view of the sky. Without a clear and unobstructed view, the altitude can be off significantly because it limits the number of satellites that can inform the calculation. It's generally less precise than position data but even under the best of circumstances it can be off by as much as 50 feet 95 percent of the time.
The number of satellites, which can be helpful in diagnosing problems, is not recorded.
We got good readings from the i-gotU indoors and out. We carried it in a jacket pocket while driving (no problem) and in a backpack's mesh side pocket without losing contact with the satellites.
TRACKING OPTIONS | Back to Contents
The software provides a number of configuration options. The Tracking Interval mentioned above is just one.
You can set the device to power itself on and off according to a schedule you set, rather than respond to the button.
You can optimize the waypoint logging interval to the battery life you need or set the tracking interval. You can also enable Smart Tracking mode, which varies the interval depending on the speed you are traveling (calculated by the device).
As a GPS device, we liked the small, unobtrusive i-gotU. It seemed to sync quickly and record our locations accurately. It was a little hard to read the LEDs in bright sunlight, but you don't really have to pay much attention to them either.
The software was another story. The user interface put us off to start with and, despite the helpful wizards, it made a chore out of creating a map of our trip. On the plus side, it did seem to have a solution for every problem we ran into, allowing us to locate our unmatched photos from the trip, for example. It wasn't easy but we got better at it.
While the device itself is platform agnostic and its GPX files can be used on either OS X or Windows, the software and the device driver are Windows only. If that shoe fits you, the i-gotU won't disappoint.
